
There are many advantages to fixing your car’s crease dents by yourself. One is that it is cheaper and saves you a few extra bucks. If you’re a DIY enthusiast, some of the materials needed are probably already lying around your house. It is also very easy and quick to do.
This article extensively discusses how to fix crease dent (in car or other vehicles) by yourself without causing damage. Note that these DIY solutions are only recommended for minor dents. If the damage is extensive or there are larger dents, you’re better off going to a body shop for a dent repair service.
How to Fix Crease Dent in Car
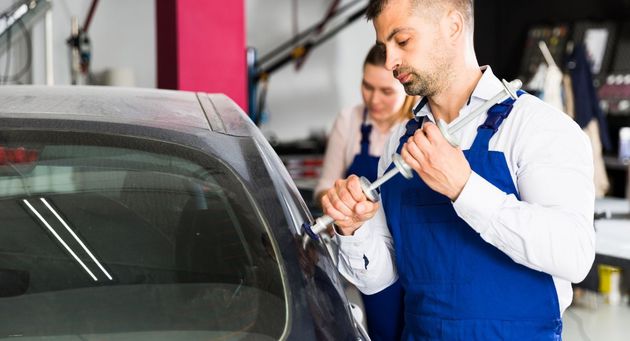
Taking care of a car can be a very challenging job. When you’re tasked with fixing a creased car dent, it is important to be careful.
These types of dents occur from mishaps and are removed by reforming the metal with tools meant for this.
The two most popular dent removal techniques are the body filler and PDR methods. They both have their pros and cons, which need to be carefully weighed before choosing your preferred option.
The PDR technique is known as the paintless dent remover/repair method. You do not need to repaint the damaged area with this method.
Most mechanics fix a creased dent by using a filler in the dent and then sanding it. They then repaint the spot and present your car to you. However, this is the part they leave out — they actually don’t fix the dent. All they do is cover it up, which may cause even more damage to the car.
Another disadvantage of using the body filler method to fix a creased dent is that it wears off over time and isn’t long-lasting.
On the other hand, one big merit of the body filler method is that it is less expensive, requires fewer skills, and takes a little amount of time to fix. It is also very good for repairing minor dents in a car.
The paintless dent repair is the most efficient, safer, and lasting option. One advantage of using this method is how it retains the value of your car. It is also eco-friendly, less expensive than other dent repair methods, and not time-consuming.
On the downside, it is best used for smaller dents, it can’t be used on plastic, and it might cause more damage if you aren’t careful.
We will cover both methods of fixing a creased dent, and since you know the pros and cons of both methods, you will be able to choose the one that works best for you.
Body Filler Method
For this method, you will need:
- Rubber sanding block
- Body putty
- Body filler (quantity depends on the size of the dent)
- Wet and dry sandpaper (150-grit, 220-grit, 400-grit, and 800-grit)
- Spot putty and glazing
- Rags
- A firm and flexible plastic spreader
- Car polish
- Paint
- Automotive primer
- Spray bottle for water
- Mask, safety goggles, and work gloves
- A tin of car polish
Steps:
1. Prepare the Surface
This is the first step to take when you begin. Body filler doesn’t stay properly on paint, so you’ll need to sand the area down to the metal. When you do this, move three inches beyond the affected area.
For this, you will need sandpaper — 150-grit will do the job just fine.
2. Prepare the Body Filler
Usually, the body filler comes with a cream hardener and a base filler you will need to mix together.
Mix this on a clean, disposable surface with a firm plastic spreader. Mix according to the instructions that come on your body filler.
After you mix, the filler will get hard in five minutes or so. It is important to work fast at this point.
3. Apply the Filler
Use the flexible plastic spreader to do this. Don’t forget to go three inches out of the affected area.
At this point, you shouldn’t be too bothered by the neatness. The sandpaper will take care of that.
4. Start Sanding
When the filler has properly hardened, you can begin sanding. Start by using 150-grit paper wrapped around a rubber sanding block.
Do this evenly in a light circular motion, and when the filler is almost smooth, switch to 220-grit sandpaper.
If you notice you missed a spot with the filler, don’t panic. Just mix more filler and start from the top. Fixing a crease dent requires patience, time, and commitment. Keep sanding the filler until it is smooth and even.
5. Apply Spot Putty to the Smooth Area
Spot putty is very similar to a filler. It doesn’t need mixing and can be applied straight from the tube to the spot.
Apply the spot putty with a flexible plastic spreader over the repaired area. Typically, it dries faster than the filler, but ensure it is thoroughly dried before moving to the next step.
6. Sand Again
This time, use 400-grit sandpaper to sand the spot putty in a light and evenly manner. It should be flat with small traces of spot putty by the time you’re done.
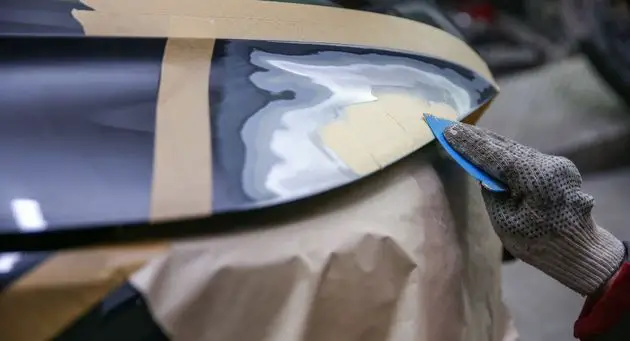
7. Prime the Surface
Mask out the area you’ve repaired. Cover up places you don’t want the primer to touch, like the tires. It is advisable to apply your spray primer in light coats, preferably three coats. This is much better than one heavy coat.
Put your mask, work gloves, and safety goggles on. Make sure you work in a well-ventilated area.
8. Sand One Last Time
After your primer coat has dried, remove the masking tape and paper and sand with 400-grit sandpaper. Use a spray bottle to spray water on the area while you sand.
Sand in a back and forth motion, and when you begin to see the old paint, you know you’ve sanded enough. You don’t want to keep going until you see metal. If this happens, you will have to redo the primer and then sand again.
9. Painting
When it comes to this, it is advisable to take your car to a professional, but it is not impossible to do this by yourself. You just have to make sure the old paint blends with the new one.
Again, you need to cover up areas you don’t want to be affected before starting. Get the same color paint in a spray can and apply three to four coats of paint. Leave to dry properly overnight.
10. Sand
Use 800-grit sandpaper wrapped around a sanding block to do this. Start sanding lightly and smoothly along the edges where the old paint and the new one meet to blend them together. Keep this area wet as you do this.
Once it is smooth and looks dull, take a rag and the cutting polish and rub the area for about fifteen minutes. Remember to keep the area wet.
The last step is to use another dry rag with car polish and rub the area until it is smooth, blended in, and shiny.
PDR Method
To use the PDR method, you need a DIY dent repair kit because every dent is different and may require the use of varying PDR tools designed for specific situations.
Some important PDR tools include:
- PDR hammer (to seamlessly pound out the dent)
- PDR tap-down (to level high points formed by pulling or pounding too far)
- PDR dent lifter (to lift dented parts to the desired level)
- PDR glue sticks and glue guns (to provide adhesives for the dent lifter)
- PDR rods or whale tails (amateurs should stay away from these, as they’re hard for untrained people to use)
The best tool to use for a crease dent is a PDR tap-down because the shape of this type of dent is usually oval, and a dent lifter may not be effective.
Steps:
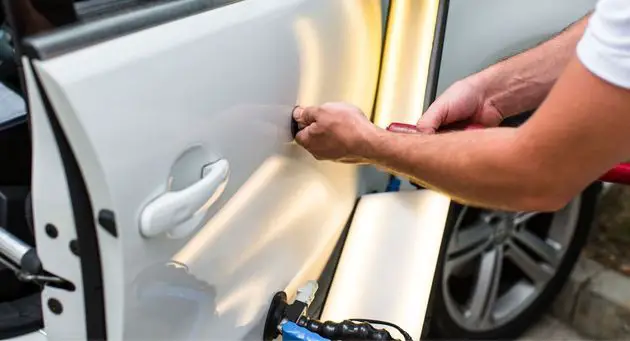
1. Take Out the Panel
Remove the dented panel from the rest of the car. You can do this by removing the nut it is held by.
After removing the nuts, take out the affected panel, then drop it on a worktop. Remember to have your work gloves on.
2. Access the Dent
Clean the panel if you need to get a closer look at the dent to determine its size, depth, and width.
3. Get Your Tools Ready
The way you place your tap-down tool (sometimes called the knockdown tool) at this moment is determined by the depth of the dent. If it is an inch dent, position the top of the tap-down dent removal tool behind the dent. Place the tap-down tool in the middle of the deepest part of the dent.
Press the metal gently to pull the metal until the recess isn’t so deep. This will help reduce dents that are deeper than one inch to a workable size.
4. Work the Dent
Place the top of the tap-down tool behind the dent again along the end of the crease dent.
Push the head of the tool against the dent to force the metal forward. Do this continuously and gently until the dent is gone.
Access the area to check if you’ve pulled a particular area too far back. To fix this, place the tool back on the dent and tap to even out the panel.
5. Refit the Panel
After this is done, refit the panel back on the car and tighten all nuts thoroughly. It is optional to wash and wax your car, but it will leave it looking new and sparkling.
Conclusion
It is very frustrating to have a dent in your car and to drive all the way to the repair shop. You can easily solve the problem if you know how to fix crease dent in car or other vehicles yourself. Save yourself a long trip and some money.
Browse through our collection of articles to find more easy ways to fix your car problems yourself.