
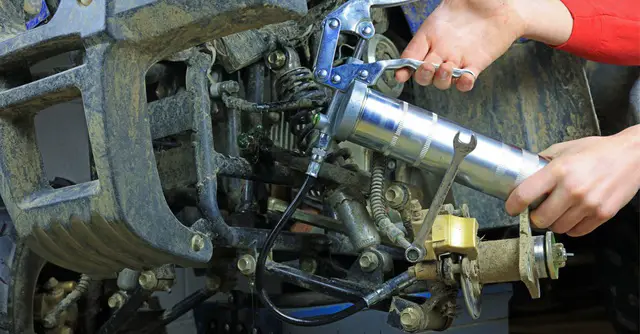
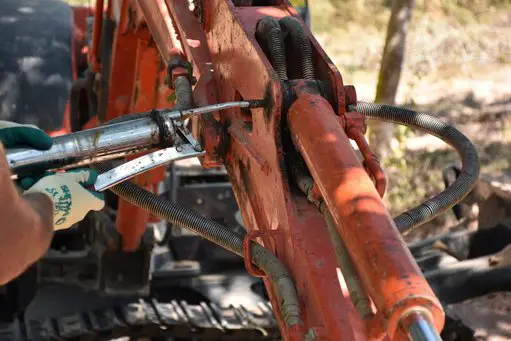
Greasing is an important maintenance step for any machine or equipment that has moving parts. It is in your best interest to ensure all the moving parts are adequately lubricant to minimize wear and tear. It is therefore important to know how to load a grease gun correctly if you intend to service your equipment yourself.
Loading a grease gun is a straightforward process that is easy to learn. If you don’t do it right, however, you might create an air pocket or lock that will prevent the grease from coming out. When a grease gun is loaded incorrectly, it might also spray the grease haphazardly, getting it all over the place. Removing an air lock is frustrating and you might even end up having to throw a good grease cartridge in the trash if you can’t correct the situation.
This article will help you avoid these frustrations and wastage. It provides a step-by-step guide on how to load a grease gun, complete with justifications of why you should follow this process.
How to Load a Grease Gun
Step 1. Grease Selection
Always use the right grease for the job at hand. Check with the manufacturer of the equipment you are lubricating to confirm compatibility and follow instructions on the grease tube. Nowadays there are specialty lubricants for different purposes and grease should be used for its intended purpose to get the best results. The wrong choice of grease might do the opposite of the intended benefits.
Step 2. Preparation
Read and understand all the manufacturers’ instructions before you start the process, especially if it’s a new grease gun or it’s your first time loading it. Even though most grease guns operate on the same basic mechanisms, there are always one or two differences and there are some enhancements that you might not take advantage of if you are not aware they exist.
Grease is messy so you will need rubber gloves, several rags, and easy access to a trash can.
Step 3. Removing the Spent Cartridge
Grip the gun by its head and unscrew the end cap of the barrel by turning it clockwise and turning the dispenser nozzle counterclockwise. The barrel houses the grease gun cartridge and is the same size and shape as the cartridge.
Draw back the metal handle or pull rod at the end of the barrel that is opposite the nozzle until it’s fully withdrawn from the barrel. This is the plunger that you use to force grease out of the cartridge. Pulling it back ejects the cartridge automatically in some grease guns, but you will have to pull out the old cartridge manually in others.
A good number of grease guns have a slot in the barrel which allows you to move the piston rod sideways. In others the retracted piston rod will lock onto a ratchet clip that secures it in place, allowing you to pull out the empty cartridge and discard it.
Step 4. Cleaning the Grease Gun
Use this opportunity to clean up the grease gun. Some grease might have leaked out as you removed the spent cartridge and there is always a chance that dirt and debris will be built up on the barrel. Use a cloth or rag to wipe the end of the barrel, removing all the grease and dirt.
Step 5. Loading the New Cartridge in The Grease Gun
Prepare the new grease cartridge for loading. Determine which side of the cartridge you will open for the grease to flow out and shake it hard towards that side so that the grease can settle on that side. Remove the cartridge cap from this end to facilitate the free flow of grease. This seal is an aluminum tab that is popped and peeled off in most cases (some smaller cartridges might have a foil seal which you should completely remove, ensuring no small pieces are left behind).
Insert the cartridge into the barrel, open end first. Push it in so that the end of the cartridge seals with the end of the barrel. You might have to twist it slightly to seal it all the way. Remove the ring pull from the other end of the cartridge.
Reattach the barrel which is now loaded with a new cartridge to the head of the grease gun. Screw it on partially to the grease gun, not all the way, leaving it loose for the moment.
Pull back the piston rod slightly to release the ratchet clip so the piston is freed from the retracted position and push it all the way into the grease gun barrel. At this point, you can finish screwing the barrel and tighten the grease gun body (you kept it loose up to this point so that you can retain the capacity to push out trapped air that can impede the gun’s grease pumping ability).
Step 6. Priming the Grease Gun
Keep pumping the handle to release all the air from the system and get the grease started. Keep at it until grease starts to come out from the dispensing nozzle. It might take several pumps for the grease to start flowing, which is normal. You should have a rag on hand to wipe off the grease once it comes out to keep the gun nozzle clean, so it doesn’t attract dirt.
Keep screwing the piston head and barrel together and push on the piston rod to confirm it’s fully engaged with the new grease cartridge. Assemble the accessories (flexible hose and nozzle tube) and pump the lever handle to confirm that grease is being dispensed from the nozzle.
Some grease gun models have a ventilation valve at the head of the gun that you should press to bleed air out of the head. Others have an air release which you unscrew in a few turns before pulling the plunger out and pushing it back in. The air will be pushed out, allowing the grease to flow.
Every once in a while, the air lock refuses to release after this process and the air remains trapped in the system, so the grease won’t come out. This shouldn’t be cause for alarm. If this happens to you, remove the plug at the end of the grease gun and continue pumping. Removing the plug shortens the distance the grease will have to travel to get to the nozzle of the gun, making it easier to release the trapped air. Once the grease starts coming out of the nozzle, you can install the plug back and keep pumping until the flow becomes regular.
Common Mistakes You Should Avoid
- Avoid changing the type of grease if you are using. A new grease will mix with residue from the previous grease, hampering the gun’s effectiveness. The different grease types might also be chemically incompatible with each other. The reaction between them might destroy your bearings or the parts that are being lubricated.
- Don’t allow contaminants into the nozzle as they might damage whatever you are going to grease next. Always cover the nozzle between uses, clean it thoroughly when changing cartridges, and ensure no piece of the cartridge cover is left inside.
- Store the gun horizontally in a cool place to keep the oil from separating. The cartridges should also be stored horizontally so that the grease can settle in the direction you want.