

The process of installing an air suspension kit varies depending on your type of vehicle, the existing type of suspension in your vehicle, and the air suspension brand you are installing. It is relatively complex and requires that you have intermediate to advanced automotive mechanical skills.
You will also need an automotive mechanical tool set. This article will provide a general guide for installing air suspensions.
Air Suspension Installation Overview
Generally, the installation process involves removing the existing suspension, particularly struts and shocks, and replacing them with air shocks. Once the air shocks are in place, you will need to set up the control system, air tank, air compressor, and wiring.
The control system regulates the amount of air going into the shocks to produce the necessary dampening effect depending on the driving or loading conditions. It is the brain and computer of the air suspension system. The control system is wired to the fuse and battery for power.
Control systems range from digital to old-design manual pumping systems. They essentially control the air level and ride height. The digital systems have additional features such as notifying you if there is a fault in the air ride suspension system. They also come with a remote that you can use to regulate the air suspension and air lift performance.
The compressor pumps air into the tank, which enables the air shocks to lower or raise. You can set up your air suspension system with one or multiple compressors. It is advisable to set up at least two compressors so that in case one gets damaged, the other one substitutes it, preventing system failure.
Different air tank options for kits vary by size, shape, and capacity. The most common options are three to five gallons. Choose depending on the size and weight of your vehicle.
Installing the air shocks is easy and straightforward, but installing the control system can be complicated.
Steps for Air Suspension Installation
1. Decide on the Type of Air Suspension Installation and Control System
The most popular air suspension kits on the market include Air Lift, Air Tec, Firestone, and VIAIR craft, among others. The right one for air lift performance comes down to your preference, budget, driving style, and type of vehicle.
2. Gather the Necessary Tools and Parts
You will need the following:
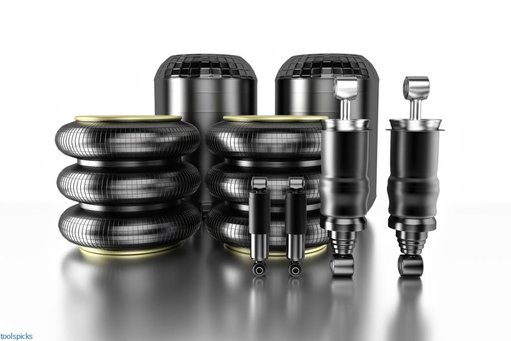
- Air shocks
- Air tank
- Compressor
- Control system
- Wiring
- Wiring harness
- Sockets
- A mechanical tool set
- Jack
- Jack stands
3. Lay Out the Tools Near the Vehicle
This gives you easy and convenient access. Visualize and think through where each part goes, how the various parts connect, and the tools to use at each step. You may also need to wear eye protection as air suspension systems operate on high air pressure, and you do not want to risk the pressurized air coming into contact with your eyes.
4. Take the Car Apart
Before beginning the installation process, remove the wheels, clear the trunk, and remove the back seats. It is much easier and faster to install the air suspension without having to remove parts at every step. Mount the car on the jack stands.
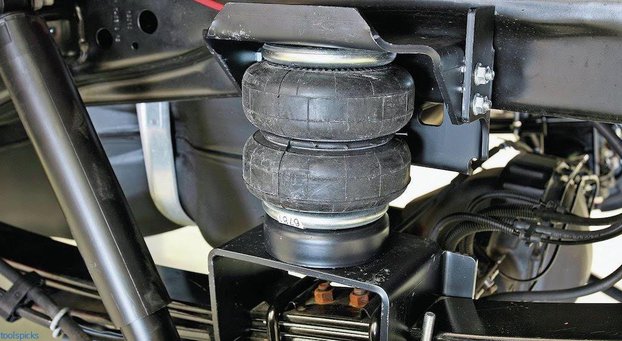
5. Install the Air Shocks
Start by removing the existing shocks and struts as you normally would if you were replacing them. Then install the air shocks in their place. You can choose to install the air suspension at the front only or both in the front and the rear. Change the shocks and air strut accordingly.
6. Install the Air Compressor and Air Tank
Most people opt to set up the air compressor and air tank in the trunk in the spare tire section. Check the product manual for installation instructions. With that said, here are some general guidelines. Using bolts or screws, mount the air tank and air compressors securely in the spare wheel compartment. Use washers on the screw for a firmer grip.
7. Install the Control System
The control arms system should be installed near the air tank and compressor but in a separate area to prevent it from getting water in case the air in the air tank compresses. Therefore, mount it on the trunk above the spare tire compartment and near the back seats for easy wiring.
8. Wire the Compressor and the Control System
Plug the main harness into the control system. Then connect the red and black wires to the compressor. If you are setting up two compressors, you will need a second power and compressor harness for the other compressor. Then connect the two sets of wiring using the relay wire. Ensure the harness fits firmly on the compressor and the control unit. You can use wire ties to keep your wires neat in the trunk and under the carpet.
9. Run the Air Lines
Each air line of the air shocks will need to be run to the compressor for it to supply air. Tuck the air lines under the carpet on the car’s floor to avoid accidentally tugging, bending, or breaking them.
10. Power the Air Suspension
Once the wires are connected to the control unit and the compressors, run them through the hole located at the back seat through the cabin under the carpet and into the front of the car to the fuse box and the battery.
A fuse and power connectors are at the other end of each compressor harness. There is an additional wire that serves as a fuse tap.
You can tap into any fuse in the electrical system of the car. If you want the air ride suspension to be powered on always, you can tap into the headlight fuse, which will drain your battery.
On the other hand, you can tap into the windshield wiper fuse as it power on the air suspension system only when the car is in ignition mode, which prevents your battery from draining.
A USB connector also connects to the remote of the digital control system you set up in the cabin.
11. Inspect and Test the Air Suspension
Once you are done with the setup, inspect each component to ensure it is well installed. Then start the car to test if the air suspension is working as intended and provides you with the best ride quality.
Conclusion
Installing an air suspension kit or air ride system may seem complicated. However, it is not too difficult if you have automotive mechanical skills and the right tools. This article provides a general guideline for installing air suspensions. Refer to your air suspension kit manual for the exact installation instructions.
If you do not feel confident about installing air suspension yourself, have your mechanic do it for you. Note that air suspension systems require regular maintenance and repairs to operate optimally.