

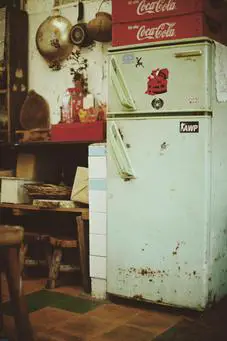
Learn how to paint refrigerator black through this guide. You don’t have to be a professional artist, and there are a variety of techniques to do it, including stencils, changing out the knobs, and so on. There are also a wide variety of colors to select from! This project can be completed for around $40 using just a few basic tools from your local hardware store.
The Equipment You Will Need
Roller
The lack of streaks and improved coverage provided by a little paint roller make it a superior tool to a standard paintbrush. If you’d like, you may also use a brush.
Primer
It’s important to utilize a metal-specific one.
Paint
Use a paint specifically designed for metal, so be sure to check the label. To prevent apparent smudge/fingerprint markings, stay away from matte or eggshell textures. There is no right or wrong color choice.
Colors seem different under various lighting conditions. On some websites, you can see how the color will vary depending on the lighting. This is quite helpful! Look for a comparable item.
What Sort Of Paint May Be Applied To A Refrigerator?
Metal surfaces should be painted using paint that can be applied. If you’re seeking anything specific, a hardware shop may be able to assist you. Check the product description before making a purchase online.
Appliance epoxy is an excellent alternative for repairing white appliances that have been damaged. As long as the manufacturer indicates that they are for metal, you may use any oil-based, water-based, or latex-based paint. Rust-oleum, one of my favorite brands, is one of the several sprays that perform well with metal.
If you want to make a retro-styled fridge or a DIY project, the blackboard is the perfect tool.
How To Paint Refrigerator Black
Set Up The Refrigerator
Once you’ve removed all of your food and beverages from the fridge, disconnect the power, and move it a few feet away from the wall or any other furniture, you’re ready to paint. Also, make sure you paint your refrigerator in a well-ventilated place!
To prevent leaks, place a tarp or ‘drop cloth’ beneath the appliance. Use old bedsheets or garbage bags if you have them on hand. It’s easier to transfer the contents of the fridge one corner at a time if you’re working alone.
Wash The Fridge’s Exterior
You need to pay attention to this step since any stains or dirt will be visible when you paint over them. To begin, lay down a drop cloth and begin cleaning the refrigerator by scrubbing it with soap and water. Also, don’t forget to tidy up any exposed edges or corners. Do not use a towel or anything else to dry the fridge, since this can leave lint and ruin the paint.
Sand It
You may begin removing the shine from your refrigerator once it has been thoroughly cleaned. Use medium-grit sandpaper to thoroughly sand the area you want to paint later. If you want your new paint to appear beautiful and last, you must go through this procedure.
Remove the old paint and reapply the new one. Only get rid of the shine. Afterward, use a moist cloth to remove any dust that may have accumulated.
Do Not Forget To Wrap Up The Handles And Seals
Using painter’s tape, you may now cover any parts you don’t want to be painted. Included in this are the fridge’s handles, seals, hinges, and any displays or other features.
It’s important to make sure that the tape is well-adhered and won’t come loose while you paint. No doubt removing the handles completely would make painting the fridge much simpler and would result in a more uniform appearance.
Apply A Primer To The Surface
In certain cases, this step isn’t essential since you may use a paint that includes primer. There is no way around the need for priming since it aids in the adhesion of the paint and provides a smooth and even finish. I
Apply a layer of separate primer and let it dry completely before going over the surface with steel wool to remove any lumps or speckles that may have formed. Apply a second layer of primer once the fridge has been cleaned and dried.
Apply The Paint
In this step, you may use a spray can or a roller to apply the paint. In each scenario, the method is unique. You may open the can of paint, mix it, and then pour some onto a tray if you’re using a roller. To apply a coat of paint, dip a foam roller in the paint and roll it over the whole fridge. Let it dry, then repeat the process. In addition to the roller, you’ll also need a tiny brush for painting the corners, edges, and other hard-to-reach regions.
Shake the can of spray paint before using it. If you don’t follow the instructions on the can, the color or quality of the paint may be different from what you expected. Allow the paint to dry between applications and then apply many thin coats, being sure to remove any lumps or spots that may have appeared during the priming process.
For at least 24 hours, let the paint cure. Don’t forget to paint the fridge’s interior frame as well. This is true even if you’re painting using a roller rather than a spray can.
Things To Remember When Painting Your Refrigerator
- To get the best drying results, you’ll need a well-ventilated space. It’s also possible that drying periods might be affected by the weather. Drying time may be slowed down by factors such as high humidity.
- If your fridge is particularly old or filthy, you may need to use an air compressor. Any food particles or dust from the refrigerator’s various hard-to-reach locations will be removed this way.
- Use q-tips to erase any errors you make while drawing. The initial coat may be sanded to remove any lumps.
- A cheap vintage fridge in yellow or a pastel hue like duck-egg or pastel pink is a good option.
- The fridge’s plastic handles may be swapped out for metal ones.
- How many coats of paint you need to apply to your fridge depends on the color of the appliance.
- Many manufacturers can combine bespoke colors with conventional colors to complement your refrigerator’s color scheme.
Final Thoughts
After following the steps in this guide, you should have a beautiful new refrigerator that’s the perfect addition to your kitchen. Be sure to take before and after pictures so you can show off your handiwork to friends and family. With a little bit of patience and careful work, painting your refrigerator can be a fun and rewarding project.
We hope you enjoyed this guide on how to paint a refrigerator. And as always, happy painting!