
When you are installing an ice maker in your home, one of the most important decisions you will make is what size supply line to use. A small supply line can cause problems with water flow and lead to a weak stream of ice. A large supply line can create unnecessary pressure on your plumbing and increase the risk of leaks. So, what size supply line should you use for your ice maker? In this article, we will discuss the different sizes of the ice maker supply line size available and help you choose the right one for your needs.
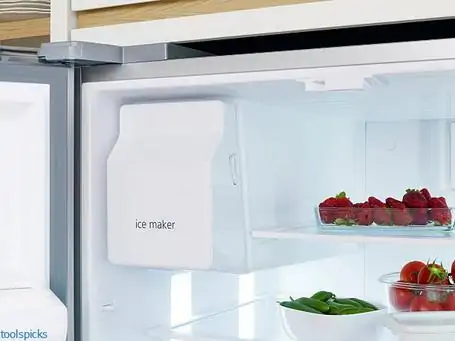
What Is An Ice Maker Supply Line?
An ice maker supply line is a pipe that supplies water to an ice maker. The size of the supply line depends on the ice maker’s water needs. A small ice maker may only need a 1/4-inch (6.35 mm) supply line, while a large ice maker may need a 3/8-inch (9.53 mm) or 1/2-inch (12.7 mm) supply line.
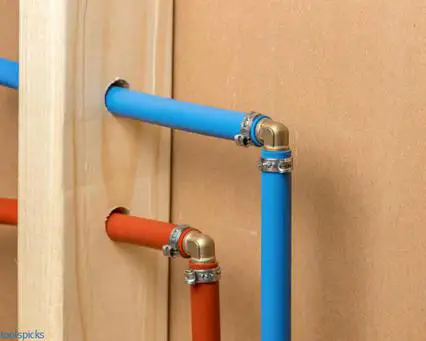
The type of supply line you choose also depends on your plumbing. Copper Supply Line: A copper supply line is the most common type of pipe used to connect an ice maker to a water source. Copper is durable and resists corrosion, making it an ideal material for plumbing. PEX Supply Line: PEX, or cross-linked polyethylene, is a type of plastic pipe that is also used for plumbing. PEX is flexible, making it easy to install in tight spaces.
It is also resistant to corrosion and freeze-thaw cycles. PVC Supply Line: PVC, or polyvinyl chloride, is another type of plastic pipe that can be used for plumbing. PVC is durable and has high corrosion resistance. However, it is not as flexible as PEX and can be more difficult to install in tight spaces.
Guide On Installing Ice Maker Supply Line
Tools Needed:
- 1/4 inch outer diameter (OD) copper tubing, long enough to reach from the cold water pipe to your refrigerator
- Pex or SharkBite tubing, also long enough to reach from the cold water pipe to your refrigerator
- A drill and appropriate drill bit(s) for the type of wall you will be drilling through (i.e. concrete, drywall, etc.)
- A hammer (if needed, for example, if you are working with concrete walls)
- A hacksaw (if needed, to cut the copper or Pex tubing to size)
- A tubing cutter (if needed, to cut the copper or Pex tubing to size)
- A measuring tape
- Teflon tape
- 2 pipe clamps
- A compression fitting (for Pex tubing) or a solderless elbow (for copper tubing)
Instructions:
1. Locate the cold water pipe that is closest to your refrigerator. If you cannot find it, turn on a faucet in your home until water starts coming out, then feel along the pipes until you find one that is cool to the touch. This is the cold water pipe.
2. Measure the distance from the cold water pipe to where you want the other end of your refrigerator’s water line to be. Add an extra 2 feet to this measurement to account for any curves or bends in the tubing that you may need to make.
3. Cut the copper or Pex tubing to size using a hacksaw or tubing cutter. If you are using Pex tubing, insert one end of the compression fitting into the end of the tubing.
4. Using the drill and appropriate drill bit(s), create a hole in the wall large enough to fit the end of the tubing through. If necessary, use a hammer to tap a hole starter kit into the wall at the desired location first.
5. Feed the tubing through the hole in the wall until it reaches the other side.
6. On the cold water pipe, wrap Teflon tape around the threads of the pipe twice. This will help to create a watertight seal.
7. Screw one of the pipe clamps onto the cold water pipe, making sure that it is tight enough to create a seal but not so tight that it damages the pipe.
8. Slip the other end of the tubing over the open end of the clamp and then screw on the second clamp, tightening it as before.
9. If you are using Pex tubing, skip step number 11. If you are using copper tubing, solder an elbow onto the exposed end of the tubing on the other side of the wall. Make sure that there are no gaps in your solder job so that water will not be able to leak through.
10. Wrap Teflon tape around the threads of the open end of the elbow (or compression fitting, if using Pex tubing).
11. Screw the compression fitting (or elbow, if using copper tubing) onto the water valve on your refrigerator. Again, make sure that it is tight enough to create a seal but not so tight that it damages the valve.
12. Turn on the water valve on your refrigerator and check for leaks at all of the connections. If there are no leaks, you have successfully installed your refrigerator’s waterline! If there are leaks, try tightening all of the connections again and checking for leaks once more. If the leaks persist, you may need to replace a damaged piece of tubing or fittings.
Choose The Right Size Supply Line
The size of the ice maker supply line you choose depends on the ice maker’s water needs. If you are unsure of the ice maker’s water needs, consult the manufacturer’s documentation or contact a plumber for help.
How Much Does Supply Line Cost?
The cost of the ice maker supply line varies depending on the size and type of pipe you choose. A copper supply line typically costs between $5 and $10, while a PEX supply line typically costs between $10 and $20. PVC supply lines are the most expensive, with a typical cost of between $15 and $30.
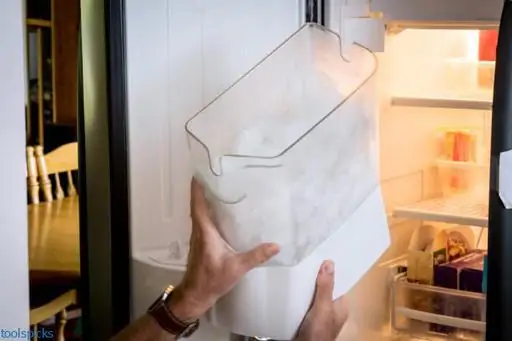
Maintaining Your Ice Maker And Supply Line
It is important to regularly clean your ice maker. This will help prevent any buildup of dirt, grime, or bacteria. You can clean your ice maker with a mild soap and water solution. Be sure to rinse it well afterward. It is also important to clean the supply line regularly.
You can do this by disconnecting the supply line from the shut-off valve and flushing it out with clean water. Once a month, you should also descale your ice maker. This will help remove any mineral deposits that could build up over time and cause problems. To descale your ice maker, simply add a descaling solution to the water reservoir and run the machine according to the manufacturer’s instructions.
After the cycle is complete, be sure to flush out the machine with clean water to remove any remnants of the solution. By following these simple tips, you can keep your ice maker and ice maker supply line in good working condition for many years to come.
Conclusion
In conclusion, it is important to choose the right size supply line for your ice maker and to regularly clean both the ice maker and the supply line. By doing so, you can prevent any buildup of dirt, grime, or bacteria and keep your ice maker in good working condition for many years to come.